This step-by-step guide covers the basics of creating tasks in GymMaster.
Task automation in GymMaster streamlines responses to key member and system events, ensuring actions happen quickly and consistently without staff effort. Automated tasks take care of routine processe, such as sending communications, applying tags, working in the background to keep things running smoothly.
The system can also create staff tasks, guiding the right person to take action at the right time. This improves visibility, accountability, and follow-through, helping ensure important member touchpoints aren’t overlooked. Together, automated system tasks and staff tasks let GymMaster manage processes efficiently while staff focus on engaging with members.
Well-designed tasks are invaluable, saving your club both time and money. It’s worth diving in and exploring their full potential.
For clarity, this guide divides task creation into three main sections, which may appear in a different order than the actual task creation flow in GymMaster.
Start by naming and describing the task, then choose whether the task is automated (run by the system) or a staff task (requires manual action). If it is a staff task, select which performer (staff) will be responsible for completing it.
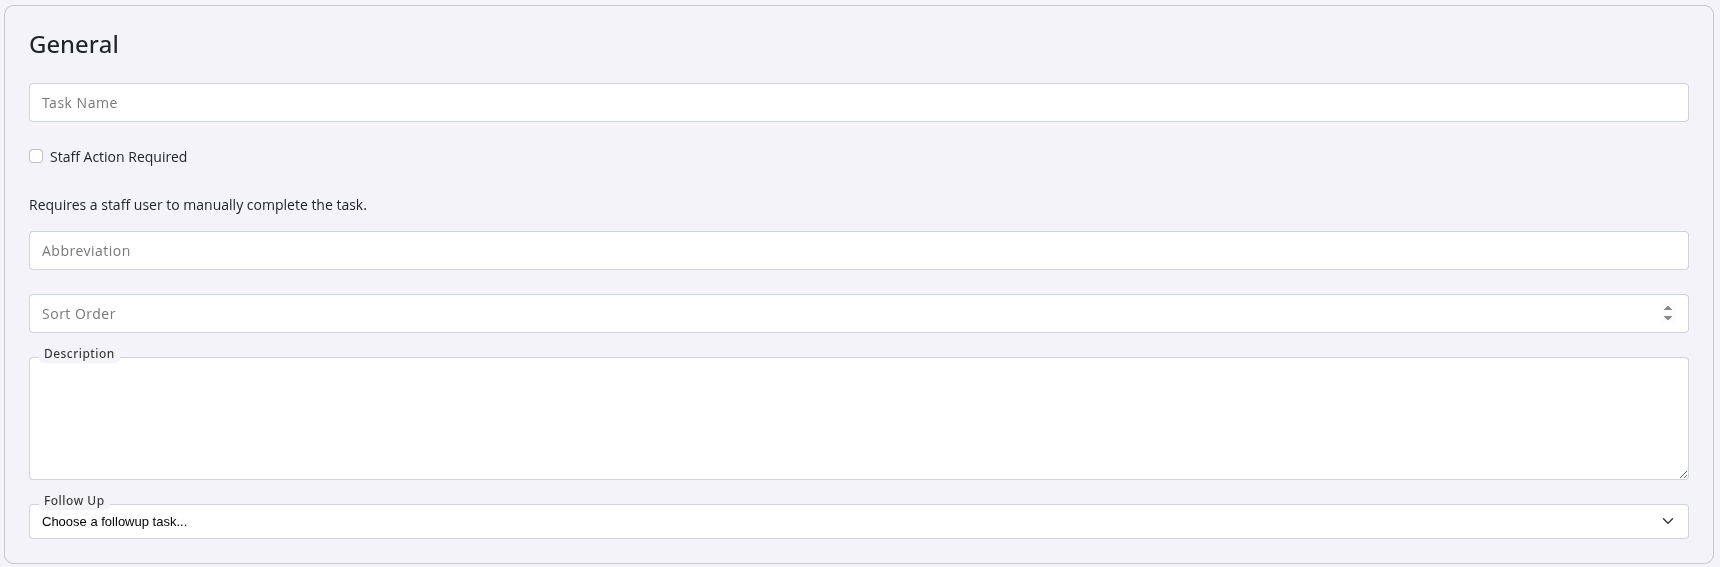
Task Name: Required
The task name will be your identifier for using/locating this task in the future. This is how the task will appear in automated lists and in staff task queues when action is required.
Choose a name staff can easily recognise later.
Staff Action Required: Optional
Tick this only when the task requires a staff member to complete something manually.
You can choose which staff member will complete the task later under Performer.
Abbreviation: Optional
A three-character shorthand that makes searching through task types quicker.
Sort Order: Optional
Overrides alphabetical order.
Setting a low number (like 1 or 2) pushes the task toward the top of your list for easier access.
Description: Suggested
For automated tasks, the description explains what this task does and why it exists. Hovering over a task name in the list displays this text.
For staff tasks, the description becomes the instructions staff see when the task lands on their to-do list. Make it clear and contextual.
Follow Up Optional
Link a second task that triggers automatically on the completion of this task.
Required when staff action is required

The Performer is the staff member (or group) responsible for completing the task. Only they will see it when triggered.
Suggested
It’s a good idea to set an expiry date for task types.
Mainly, this is a fail-safe to help prevent tasks that are no longer relevant from appearing in your Task list, if the performer forgets to complete it.
This step determines the condition that activates the task. The trigger is the internal event or condition that tells GymMaster to run an automated action or assign a staff task. Examples include a new member joining, a failed payment, or a booking made by a new member.
Choosing the correct trigger, and configuring its specific criteria, is essential for the task to run as intended. Take time to review the available options in this section to ensure the task behaves correctly.
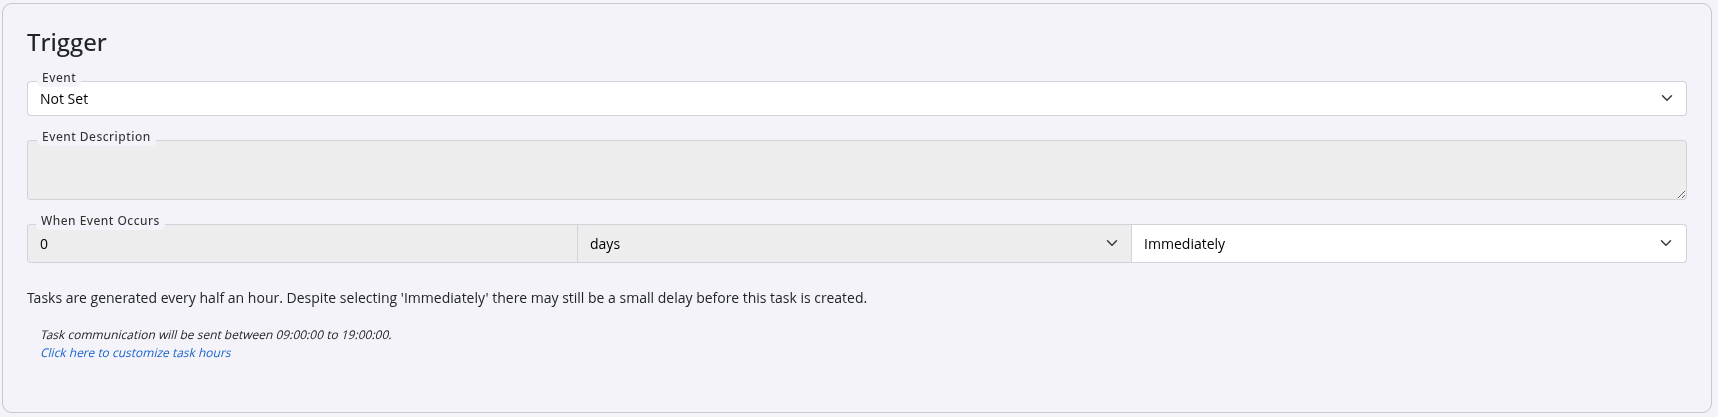
Event Required
Select the event the task should be based on, such as a member’s birthday, or non member booking their first class.
Only member-related system events can be selected, but the range is vast. Use the search filter to narrow down the option you’re looking for.
When Event Occurs: Required
Choose when the task should fire relative to the event you’ve selected: before, after, or immediately.
For example, you might send an automated email one week before a member’s birthday, or immediately when a non-member books their first class.
Depending on the event, you may see additional filters, adding specificity to the trigger:
GymMaster generates tasks every 30 minutes. Even when set to Immediately, there may be a slight delay.
By default, communication tasks only send during working hours—this can be adjusted under Settings > Advanced Configuration > Tasks.
This step determines what happens when the selected trigger occurs. For example, if the trigger is a member’s birthday, the system could send an automated email or SMS, prompt staff to acknowledge the member at check-in, or apply a Birthday tag to the member’s account.
All actions listed below are optional and can be combined within a single task. However, at least one action must be selected for the task to have any effect.
Optional
This action relates to an effect which occurs when the member enters through your reception door.
If you want the task to affect access control when the member checks in, set it here.
No Action at Door: Default. Member enters normally.
Alert at Door: Member enters, but staff receive a yellow notification prompting them to take action based on the task description.
Stop at Door: Member is denied access, and staff see a red notification.
Access may be granted once the task is resolved, depending on context.
Optional

This action sends a selected email when the trigger condition occurs.
Write and attach the communication template to send automatically.
Email to Member: Send an email to the member when the trigger event occurs.
For example: send a birthday email one week before their date.
Email to Performer: Email the staff member responsible for completing the task.
Email Template: Attach an existing template or create one on the spot.
Templates can auto-populate personalised details for each recipient.
Optional

Create personalised mobile push notifications that send automatically when the trigger event fires.
No Action: Choose this when no mobile notification should be sent.
SMS (Try App Notification First): Message will attempt to send as Member App notification first. If fails, message will send by SMS.
APP Notification: Message will only send as Member App notification.
SMS and APP Notification: Message will send as both SMS and APP Notification. Members with both communication options open will receive message twice.
Notifications can be combined with emails. If both are selected in task, they send at the same time.
Optional
Automatically add or remove member tags based on the trigger event.
Tags help group members by traits, interests, or status.
No Tag: No change to tags. Add Tag: Automatically apply a tag when the event occurs. Remove Tag: Automatically remove a tag when the event occurs. Associated Member Tag Choose which tag is added or removed.
New tags can be created at Settings > Custom Fields > Tags.
Optional

Awards are digital badges that recognize achievements, milestones, or engagement.
Automated tasks can award members when they reach visit milestones, complete challenges, or hit a specific goal.
No Action: No award changes. Add Award: Automatically grant an award when the event occurs. Award Template: Select which award template should be applied.
Optional

Use this when you need the trigger event to change something within the prospect funnel.
For example, the event may change a prospect from one stage to another, when they complete a tour or sign up for a membership.
No Action: No change to funnel status. Set Not Interested: Move a prospect to Not Interested and select the reason. Change Funnel Stage: Move them to another selected funnel stage. Snooze in Funnel: Pause follow-up tasks until unsnoozed. Unsnooze from Funnel: Resume follow-up tasks and prompts.
For more details on creating tasks for your prospect funnel, see Prospect Funnel Task Automation
Save Task Type
Your task is now active.