This guide explains what each field relates to when building and managing your Prospect Funnel, found under Settings > Custom Fields > Prospect Funnel.
For a step-by-step walkthrough on setting up your own funnel, see Configure Prospect Funnel Guide.
The prospect funnel can be enabled under Settings > Advanced Configuration > Member > Enable prospect Funnel.
The funnel comes preloaded with standard stages and can be customised to match how your club converts leads into members.
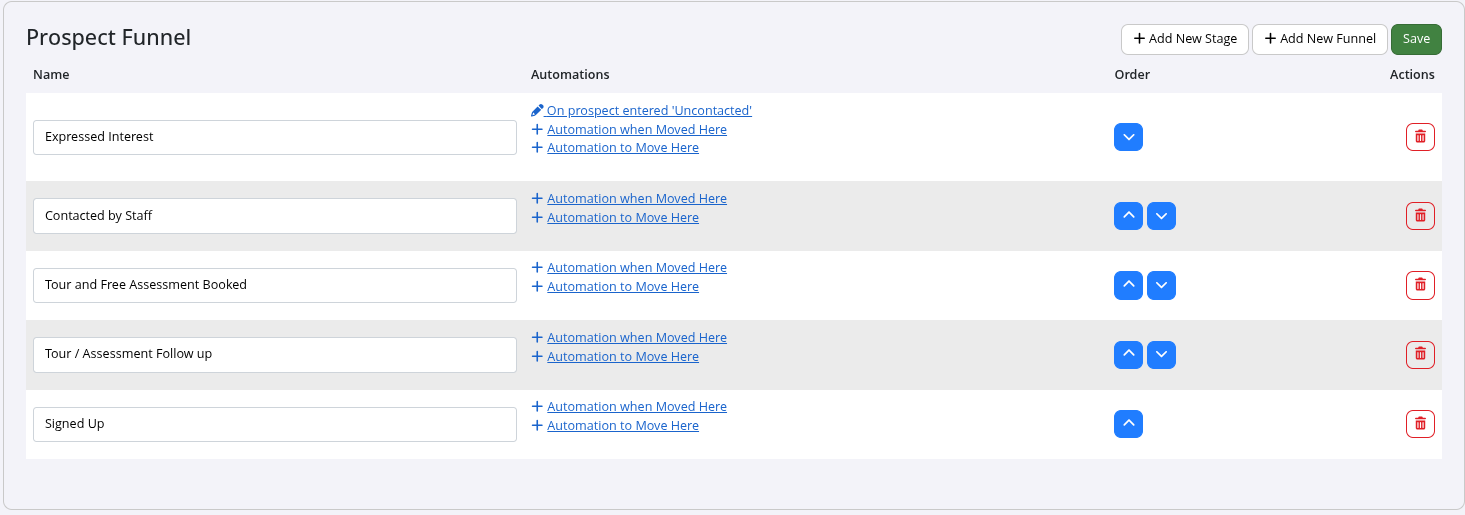
The fields listed here represent the stages of your Prospect Funnel.
By default, all new prospects typically enter the funnel at the first stage. This stage typically indicates that no direct staff contact has occurred yet. The prospect may have submitted an enquiry form, made a casual booking. Integrations with lead management systems such as GymLeads and Zapier can also pull prospects into the prospect funnel, such as through a facebook contact form.
You can also create customised tasks to add prospects into the funnel, based on your own criteria.
Each stage can be renamed, reordered or deleted, to match your club’s specific prospect journey.
Use the Order arrows to change the sequence of stages in the funnel.
Use Delete to remove stages that are no longer required.
Note that prospects do not need to move through every stage in order. Staff can move a prospect directly to any stage at any time — for example, if a prospect signs up early, skips a tour, or clearly indicates they are not interested. This flexibility allows the funnel to reflect real-world conversations rather than forcing a rigid process.
Task automations can be configured for each stage to ensure prospects receive the appropriate communication or staff follow-up at the right time.
When a prospect enters a stage, one or more automated tasks can trigger. For example, when a prospect first enters the funnel, an automation might send a welcome email introducing the club and inviting them to book a tour, free assessment, or short phone consultation. If no response is received, a follow-up task can later prompt staff to make direct contact.
Each stage supports its own set of automated tasks, which run when a prospect enters that stage, or move them to another stage. As prospects respond or progress, automations or staff can move them into the next relevant stage, which then triggers the automations associated with that stage.
For more examples of how task automation can be used to support various stage, see our Prospect Funnel Example Guide
Adds a new stage to the funnel. It defaults to the final position of the funnel.
Once added, the stage can be named and reordered to fit the logical flow of your prospect journey.
After saving, automation links will become available so tasks and communication can be configured for the new stage.
Any changes made to your Prospect Funnel must be saved before leaving Custom Fields.
If changes are not saved, they will not be applied to your funnel.
For a step-by-step guide to creating and configuring your Prospect Funnel, refer to Configure Prospect Funnel Guide.