
The Silver Sneakers program is an initiative encouraging physical activity from older adults to better maintain their health - it is an American program, however there may be other similar initiatives in other countries if you live outside of the US. Silver sneakers sponsors a host of social and physical activities - including fitness classes and gym memberships.
There are a number of benefits for offering or accommodating the Silver Sneakers program within your gym. From increasing club usage during off peak hours (many elderly people work out during the day time), improving the suitability of your club to a wider range of potential gym goers or just boosting the diversity of your membership base.
How to Setup GymMaster for the Silver Sneakers Program
Setting up the Silver Sneakers program with GymMaster is easy using the software’s reporting functionality. Here is a quick setup guide to preparing your very own Silver Sneakers report
Step 1: Create a Custom Field for your Silver Sneakers ID
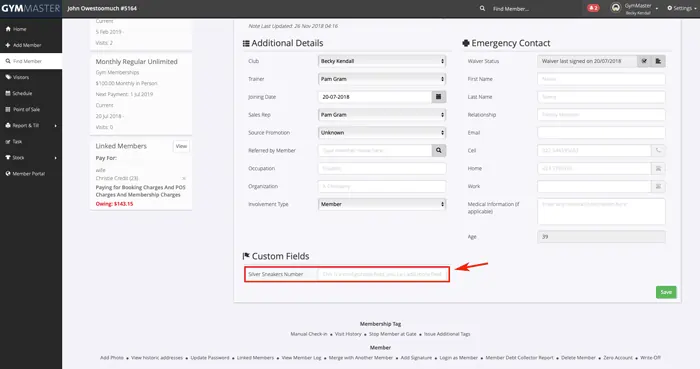
First, we need to prepare the members page so you can easily enter in Silver Sneakers numbers as you receive them from your members.
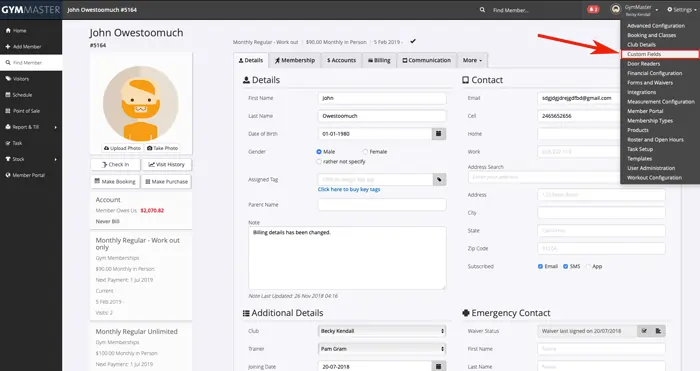
To do this, please click on Settings -> Custom Fields
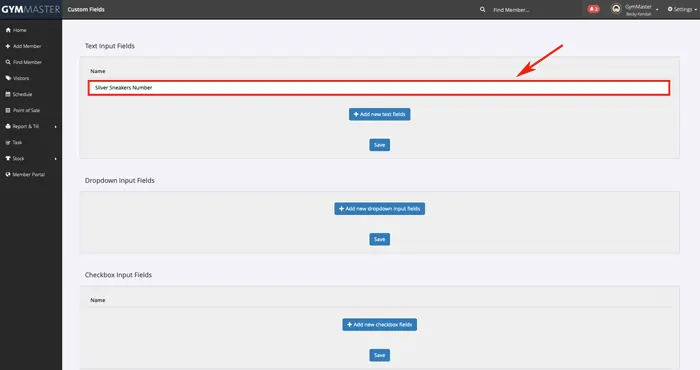
Under ‘Text Input Fields’ type in the name of the custom field you want displayed within your member page (e.g. Silver Sneakers Number). Then click Save.
Step 2: Creating your Silver Sneakers Report
Now that you are able to add in the member’s silver sneakers number, all you need to do is prepare a report to display all of the information.
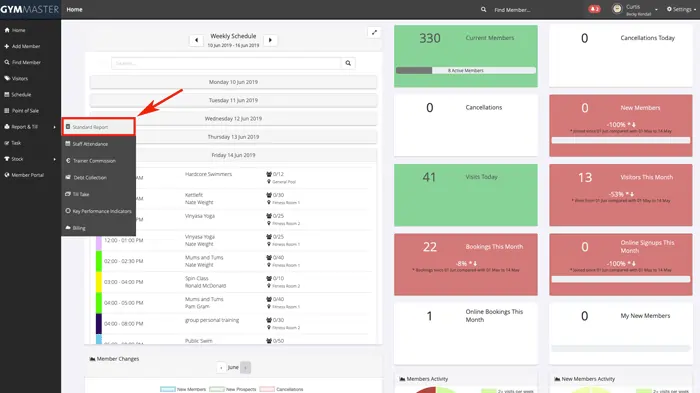
To create your report, click ‘Report and Till’> ‘Standard Report’> ‘Retention’ > ‘Visitor Log’ - This report shows every visit by your members over a specified period. We will need to filter this to only show Silver Sneakers Members.
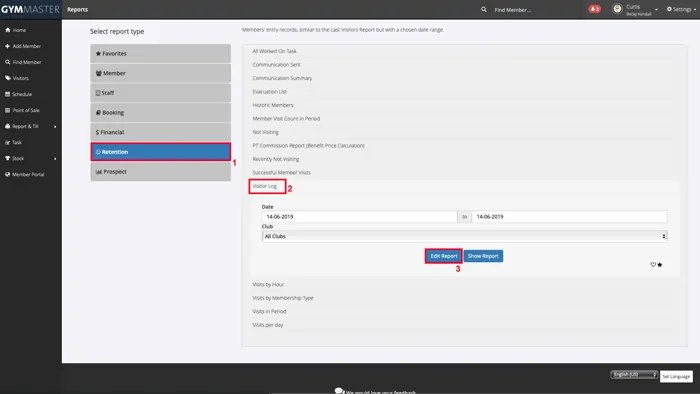
To do this, select the report and click on the ‘Edit’ button - This will display the information which will be generated on the report.
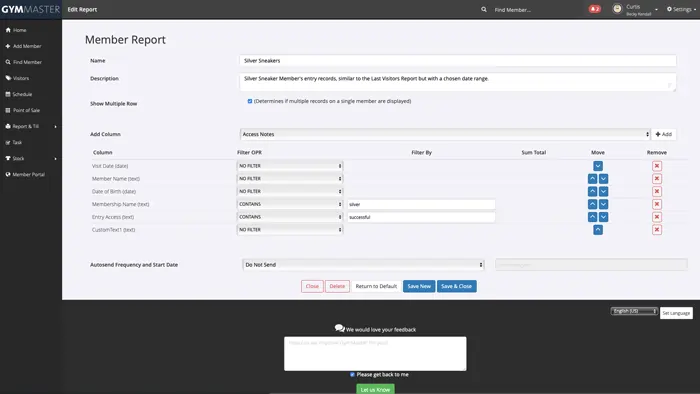
From here, you will need to filter the ‘Membership Name’ to contain the word “Silver Sneakers” - This will capture visits from your members on the Silver Sneakers membership (for this to work, you will need a membership named accordingly for your members to sign up with - click here to learn about creating new membership types).
- Now you just need to filter the report so only those visitors who were granted access are shown - filter ‘Entry access’ to contain “successful”
- You can then remove the fields not required (eg. Member ID) and add the fields that Silver Sneakers requires (Silver sneakers ID, date of birth etc) by using the “add column” drop-down menu. The Silver Sneakers ID is the “Custom Text 1” field in this case. However, if you already have other custom fields set up the number on the end may be different.
- Make sure the option of ‘Show Multiple Row’ is enabled ( Under the ‘Description’ field)
- Re-name the report at the top of the page before saving using the ‘Save New’ button. This will save the report to the list so that you can run it at any time.
Step 3: Run Your New Silver Sneakers Report
Now you are all set up! To find your new report, click ‘Report & Till’> ‘Standard Report’> ‘Retention’ section> Select the ‘Date’ range of the visitation that you are reporting> ‘Show Report’> Use the “export to CSV” button to save the file to your computer. After exporting the report to CSV we must remove the two filtered fields before sending to Silver Sneakers. This is because they are not are requested by Silver Sneakers.