to do: michael to review, content correct?
Add links to custom fields guide + set up billing provider guide
Many potential members will discover your club online, through your website, social media, or paid promotions. Online sign-up allows those prospects to move straight from interest to action, without needing to contact staff or visit the club first.
You can link directly to an online sign-up page from your promotions, ads, or website. This gives prospects a clear, immediate way to join, no matter where they first encounter your club.
Once they arrive, a smooth and well-configured sign-up experience removes friction and increases conversions. By working through the steps below, you ensure the process runs exactly as intended, allowing members of the public to complete their entire membership sign-up online, from start to finish.
To embed or more tightly integrate the online sign-up process within your own website, see Settings > Integrations > Member Portal API > Member Portal Online Integration.
To enable online sign up, begin by navigating to Member Portal Configuration > Sign-Up > Enable online sign-up.
This will allow the public to sign-up for memberships via your member portal access page.
Work through all options; this will define which details you will be requesting from your new members on signup,
!! where is URL set where potential members can link into the sign-up page.
enbed into own website….but more common is buy online link to their own membership list - use link from membership type page.
quick sign up form - can be used; create under member portal buttons, enable under membership type. NEED to use the quick signup link to the memebrship for it to be used, eg in a promotion or website, otherwise if linking through the usual way it will use full traditional form.
When members sign up online, they will first be asked to select the membership type they wish to purchase.
To make memberships available online through the Member Portal and Member App, each membership must be individually enabled for online purchase.
Navigate to Settings > Membership Types, then select an existing membership to edit, or create a new one.
Enable Online Sign-Up under Sell Membership Online, add a short description (this appears online), and complete the required membership details.
Repeat this process for every membership you want available online.
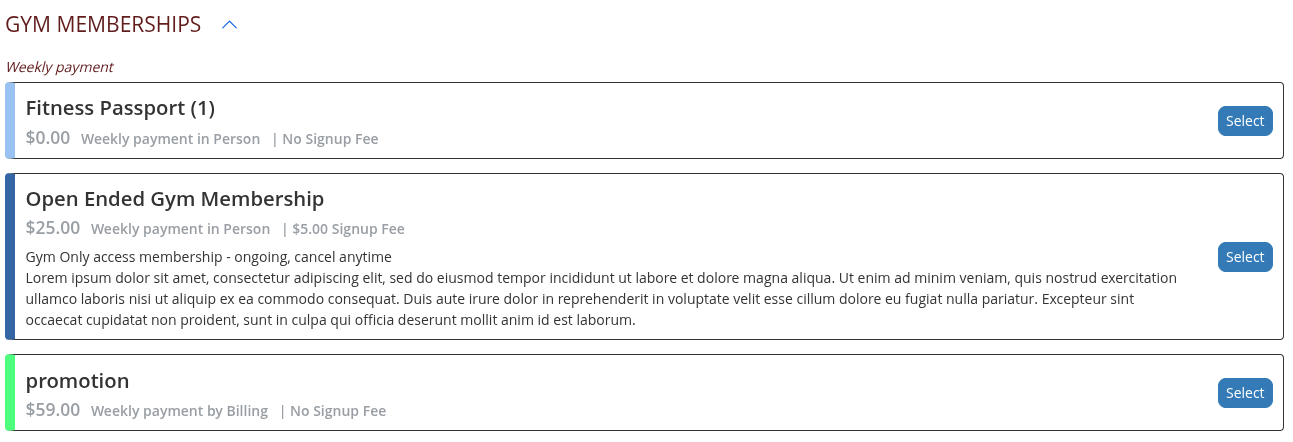
Control how memberships appear in the Member Portal so they’re easy to understand and simple to choose. You can group memberships into categories or optionally guide members through a multi-step selection flow. Add colours for aesthetics and easy recognition.
Category View:
Shows all memberships grouped by membership type category. No extra setup is needed beyond creating categories and colours.
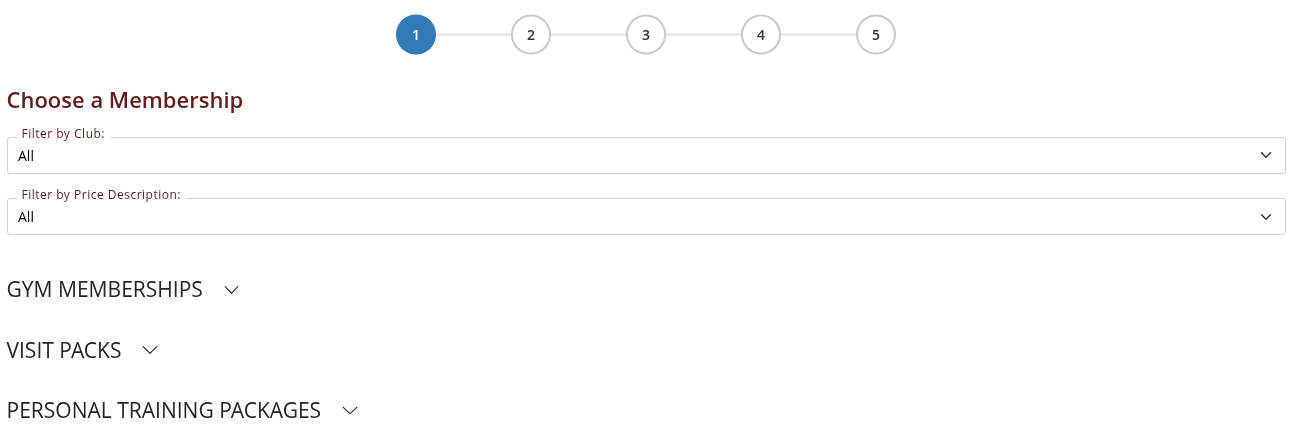
Image above shows memberships listed by category. Member selects heading to see full list of memberships.
Multi-Step Membership List:
This guides members through two steps: first choosing a category, then choosing a membership grouped by payment frequency (for example, weekly or monthly). To enable the multi-step option, go to Settings > Advanced Configuration > Member Portal Configuration > Membership, turn on Multi-Step Membership List, and adjust the payment frequency labels if needed.
Colours:
Colours make it easier for members to visually scan and compare options. In Settings > Membership Types, add or edit a membership and select a Membership Colour using the colour bar under the membership name. You can choose from the default palette or set a custom colour.
Text colour adjusts automatically for readability.
Repeat for each membership you plan to sell online.
New members will next be asked to fill out the sign-up form, completing their personal details.
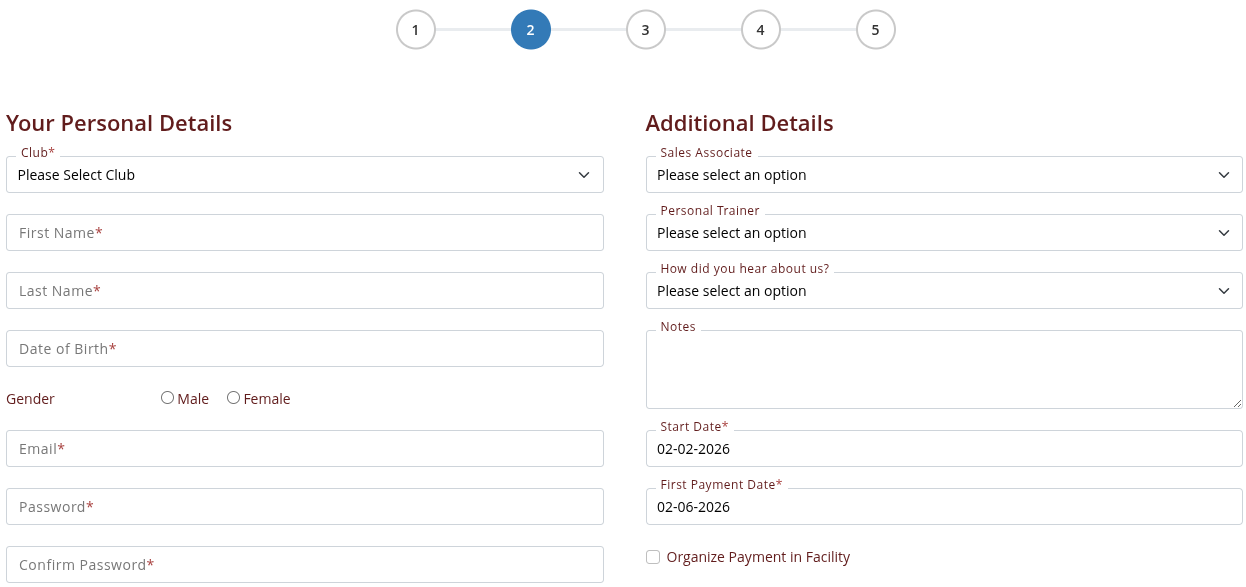
Go to Settings > Advanced Configuration > Member Portal Configuration > Sign-up. Once online sign-up is enabled, there will be a list of options here. Carefully review and configure the form fields, as these determine what information new members are required to provide. Some fields will pop up with the adding option to require this field in order to continue.
If you need to collect additional information beyond the standard fields, you can add these using custom fields. (!!Update guide link here)
During the sign-up process, members are required to agree to any forms linked to their membership. This commonly includes terms and conditions, waivers, and contracts, which may require agreement, initials, or a signature. Questionnaires, if enabled, are completed after sign-up.
All forms are created under Settings > Forms and Waivers. Once created, they must be attached to the relevant Membership Type.
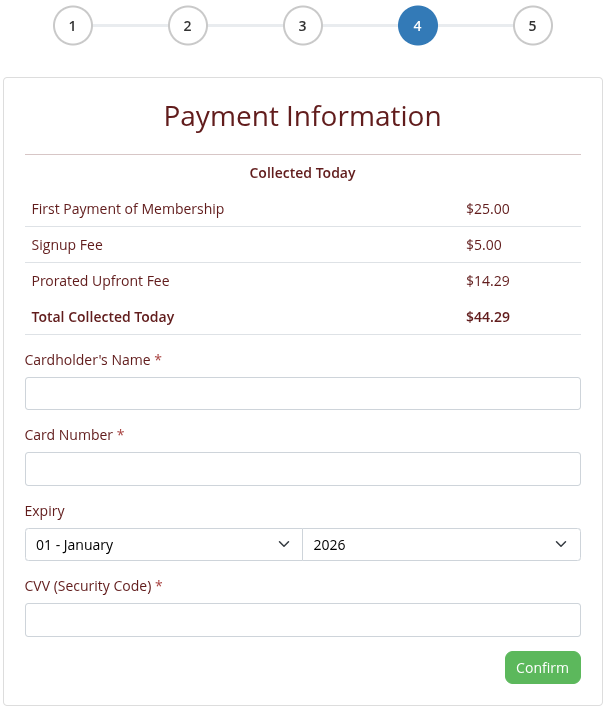
Members will next be asked to enter their credit or debit card details.
These are sent directly to your billing provider for secure storage and for processing ongoing payments.
For setup instructions, see Billing Provider Setup. (!!Update guide link here)
Note: GymMaster does not store payment card details. All billing information is handled securely by your chosen billing provider.
CUT IMAGE or note that this page will look different based on billing provider.
Once sign-up and payment are complete, members see a confirmation page and receive a confirmation email.
You can choose how the confirmation page is presented;
A confirmation email is sent automatically after sign-up.
Email templates are set up under Settings Templates and assigned via Settings > Member Portal > Communication.
Your confirmation email should clearly include the member’s membership details, instructions for their first visit, Member Portal login information, and guidance on downloading the Member App.
Online setup complete. We suggest working through the online sign up process as a new member, to ensure every step is functioning as you need it to, before going live.
Depending on your access setup, new members may be able to enter the club on their first visit using Bluetooth, QRCode or Passcode.
Key fob access can be issued when they visit the club in person.