
Create and Schedule Your Classes
Before members can book a class, you’ll first need to create the class, then schedule when and where it will run.
Most clubs only need to create a class once. After that, it can be scheduled as many times as needed with different days, times, instructors, and locations.
Think of the class as the template, and the schedule as the when and where the class runs.
Class Settings
Begin at Bookings and Classes > Classes > Class Settings.
Review both the Advanced and Member Portal Configuration tabs before creating your classes.
- These settings control the default behaviour for all classes, including enrolment, cancellation, and booking rules
- While these defaults apply to every class, many settings can be overridden when creating an individual class
Create Class
A class contains the information that stays the same each time it runs, such as its name, description, duration, capacity, and booking rules.
Begin at Bookings and Classes > Classes
- Select Add Class
- Complete the class details, including the category, duration, maximum participants, and the colour used to display the class on your schedule.

Next, select Who Can Attend This Class. You can enable one, several, or all attendance options, each with its own pricing.
For example, the class below can be attended by current members, casuals, and Class Pack holders.
- Current members with class benefits can attend according to their membership benefit rules
- Current members without class benefits pay $10 per class
- Casuals and prospects pay $20 per class. This includes members whose memberships are not counted as current, such as pack only or trial only members
- Class Pack holders can redeem one pass to attend the class, whether or not they are current members
Who is a current member depends on the Membership Basis of their membership. See Members, Casuals and Prospects for Classes and Services.

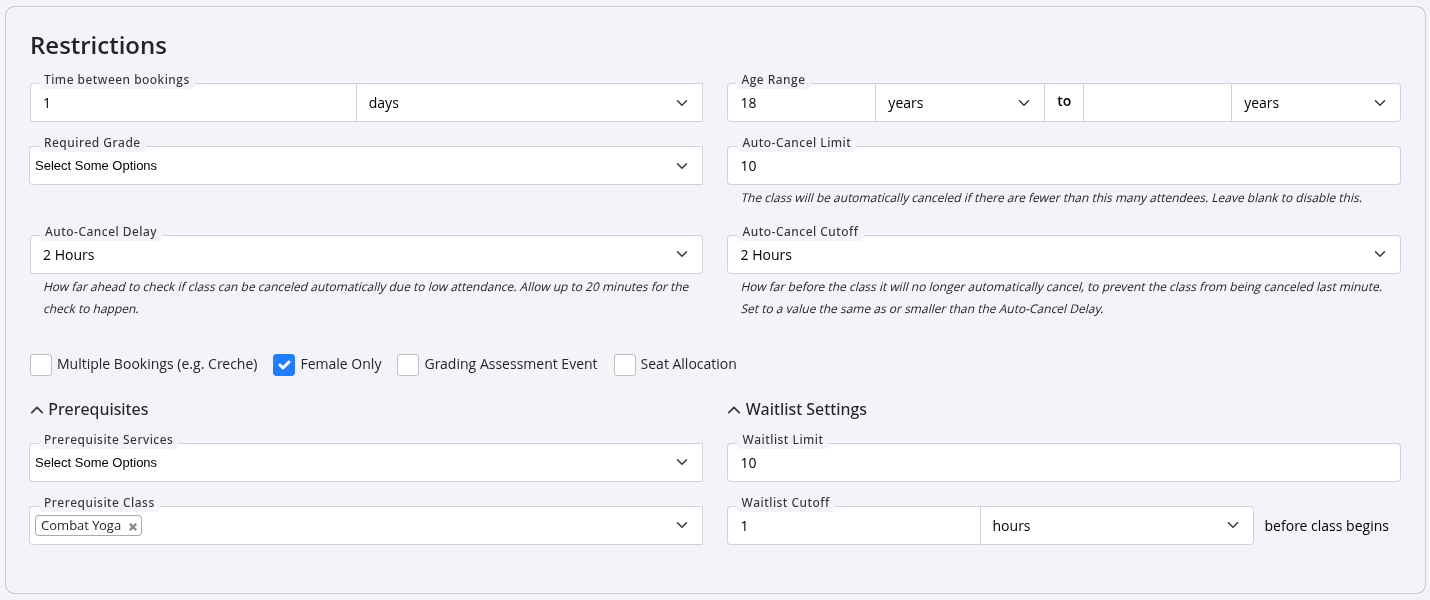
- Add any restrictions that apply to the class
- You can also configure prerequisites and the waitlist
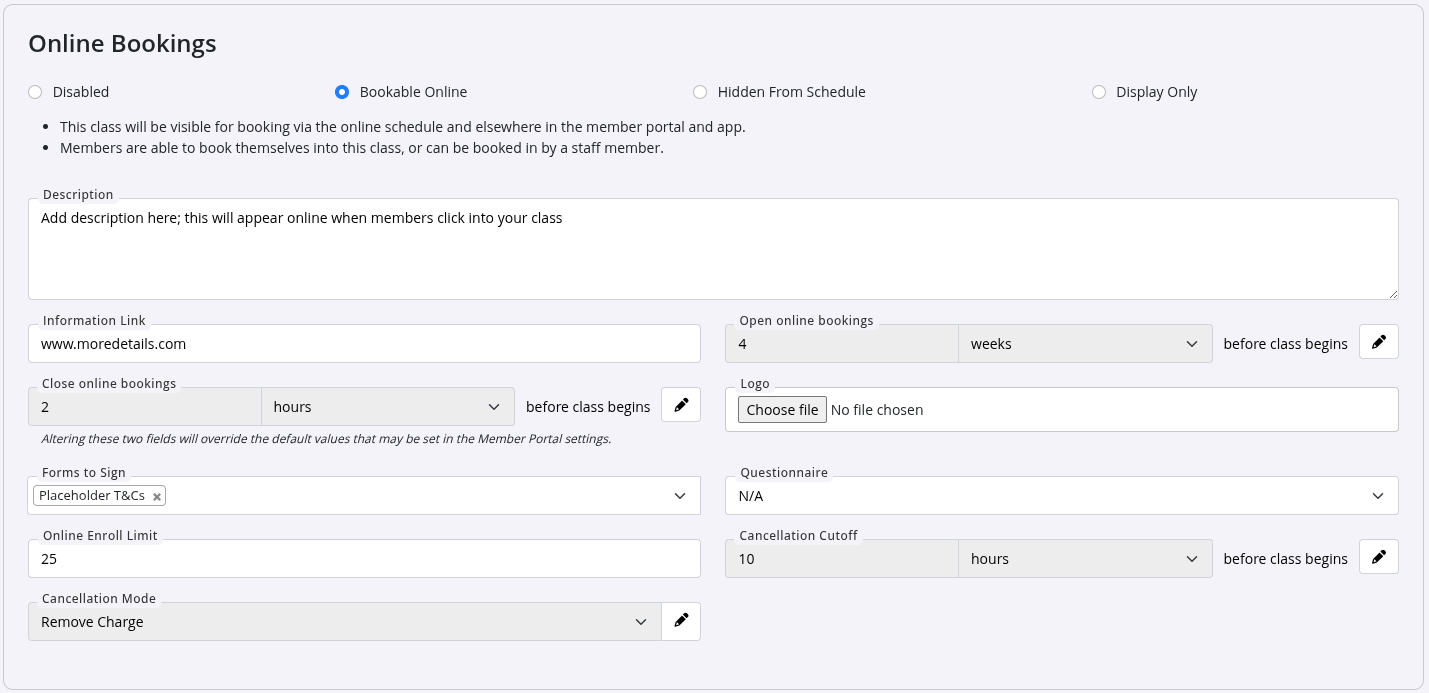
To make the class available for online bookings through the Member Portal and Member App:
- Enable Bookable Online under Online Bookings
- Complete the remaining options. Greyed-out fields inherit the default settings from Class Settings, but these can be overridden for this class using the Edit icon.
- Add commission details if required
- Save
Schedule Class
After saving your class, a prompt will appear allowing you to schedule it immediately.
You can choose to schedule the class now, or skip this step and schedule it later.
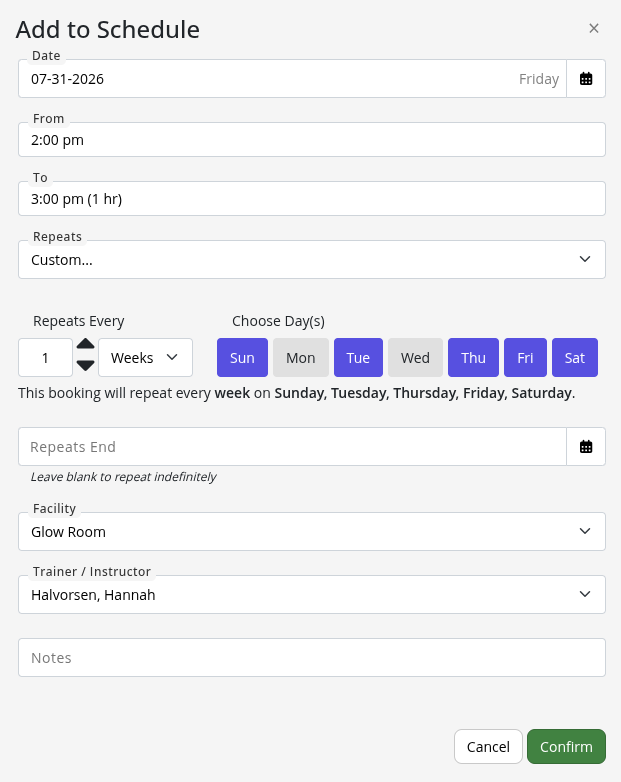
To schedule the class:
- Complete the scheduling details, paying particular attention to the Repeats option
- Select the facility where the class will run
- Allocate the instructor who will lead the class
- Once complete, the class will appear on your Schedule and will be available for members to book in person and online.
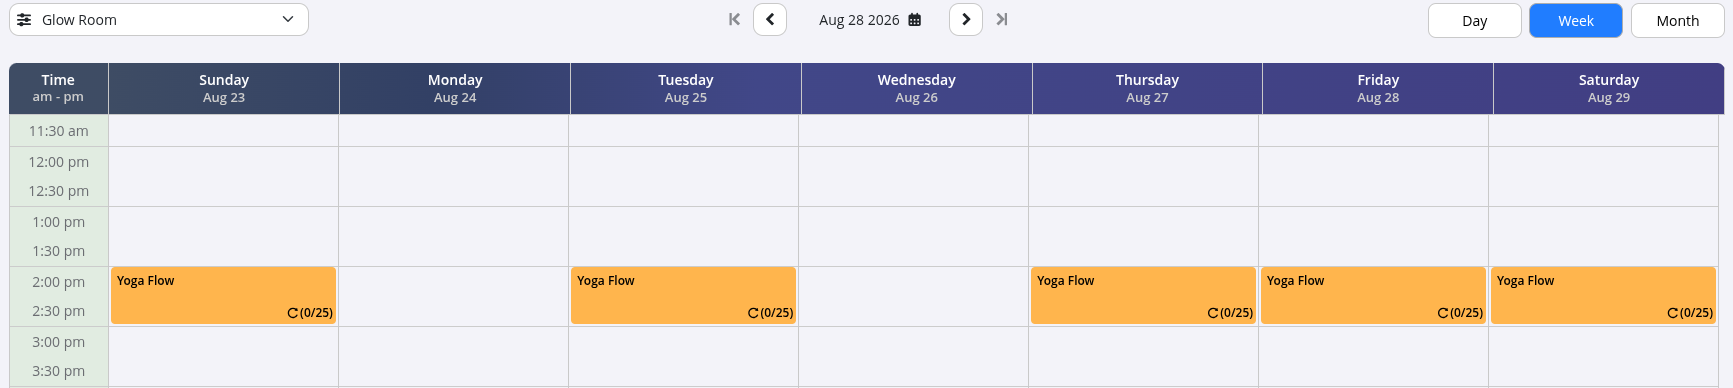
To schedule a class at a later time, or to add more scheduled times, you can either:
- Select Add to Schedule from the Edit Class page (top-right corner)
- Select a timeslot directly from your Schedule, then complete the booking details
Common Questions this Covers
- How do I create a class in GymMaster
- How do I add a new class to GymMaster
- How do I schedule a class in GymMaster
- How do I add a class to the schedule
- How do I create a recurring class timetable
- How do I make a class available for online bookings
- How do I set who can book a class
- How do I add an instructor to a class
- How do I set class capacity and booking rules
- What is the difference between creating and scheduling a class

 2026 © Treshna Enterprises Ltd.