
Let’s go through a deep dive into a powerful feature offered to all GymMaster clients - the ability to customise reports!
Custom reports can be used to gather the relevant information which you might need conveniently into one place for use in your business. From using expiring or lost member reports to get in touch with clients who’s memberships are about to lapse to creating a report with all of your members emergency contacts for quick access in an emergency. The situations which you can use your custom reports is only really limited by your imagination.
Creating your own custom report takes less than 5 minutes, let’s go through the process together.
Creating your Custom GymMaster Report
For this example we are going to create a report with the member’s details as well as their emergency contacts.
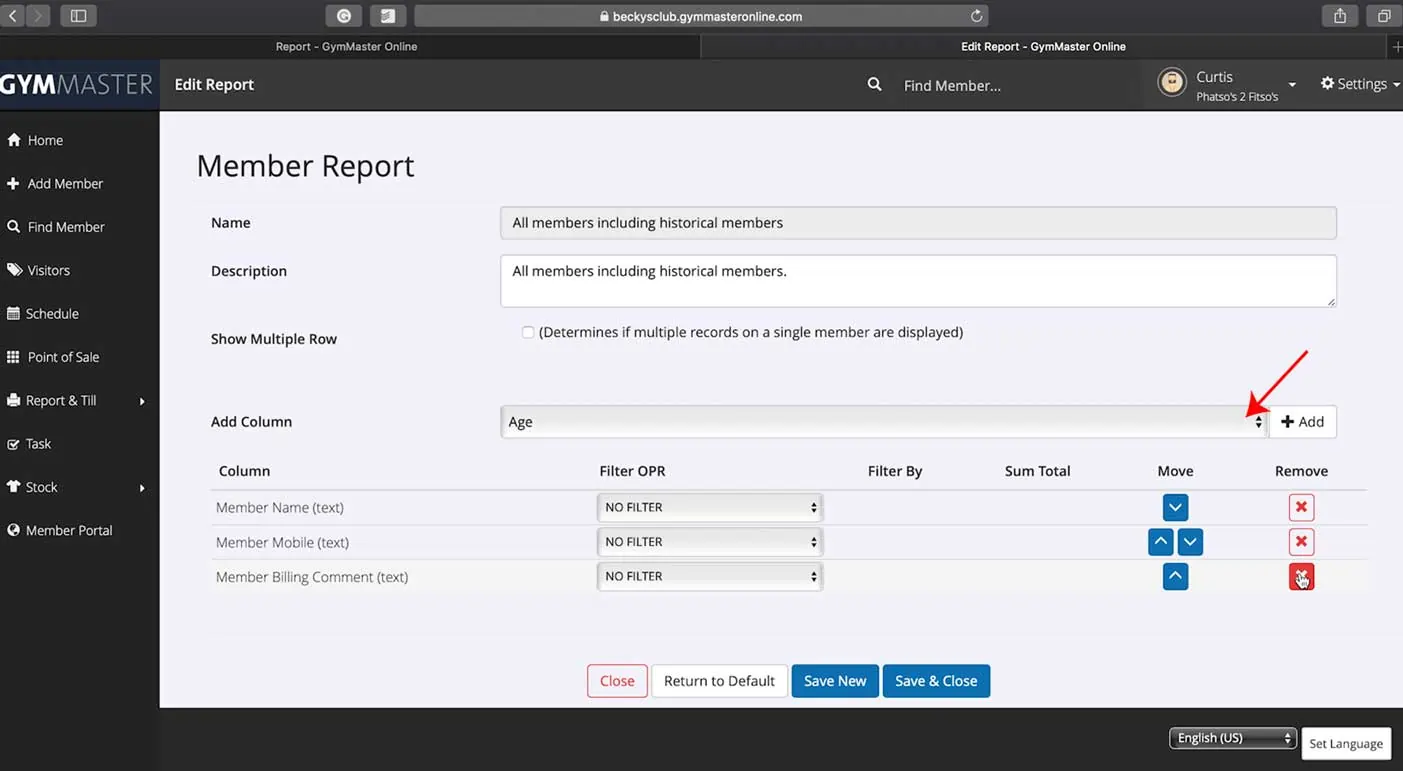
While any of the reports in the “Standard Report” list can be customised and edited, for this example we will use the “All Members including historical members” report, which shows us all of your gym’s members past or present.
To find this report, we click the following:
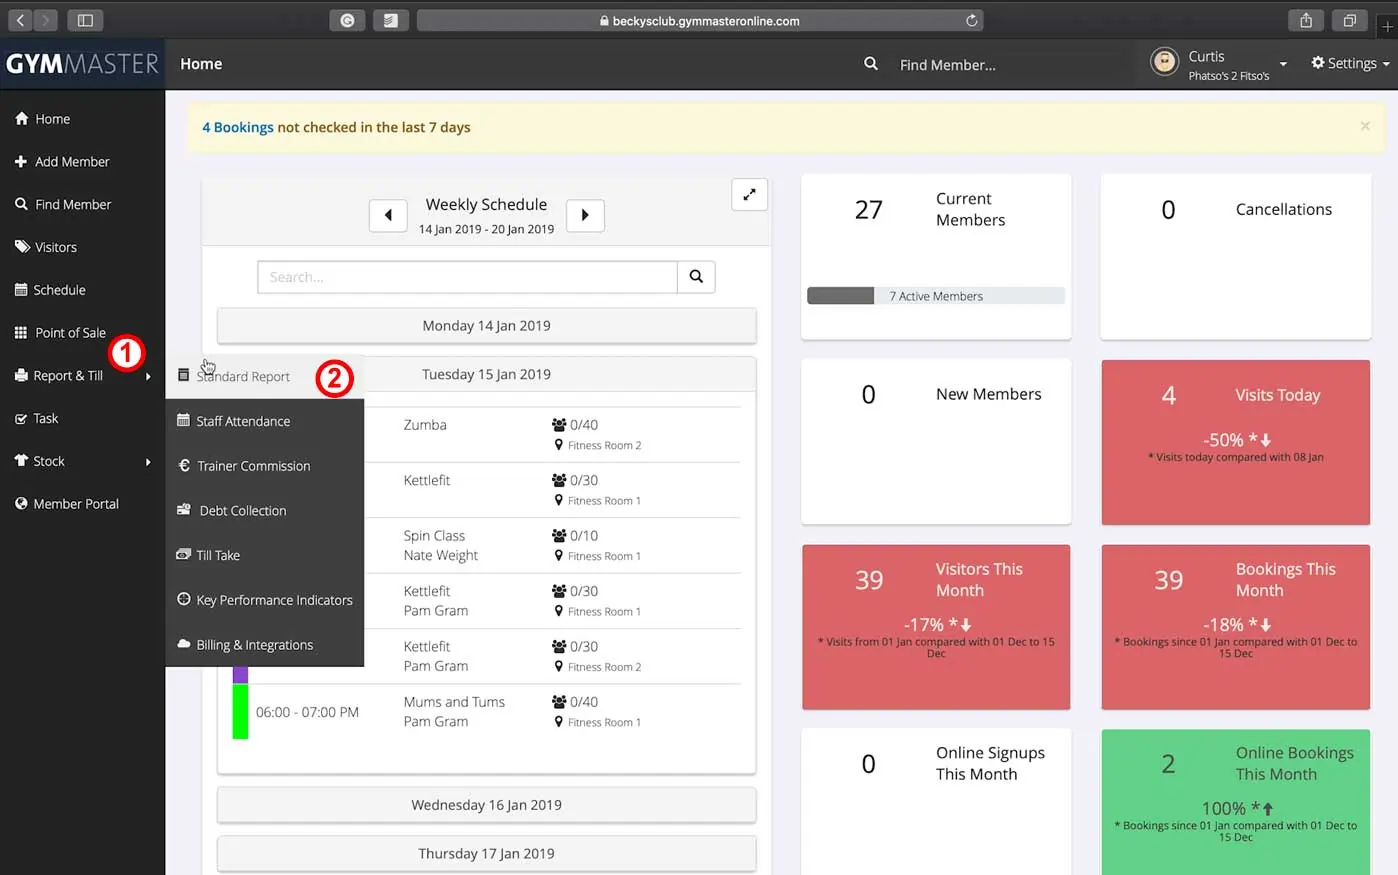
- “Report & Till”
- “Standard Report”
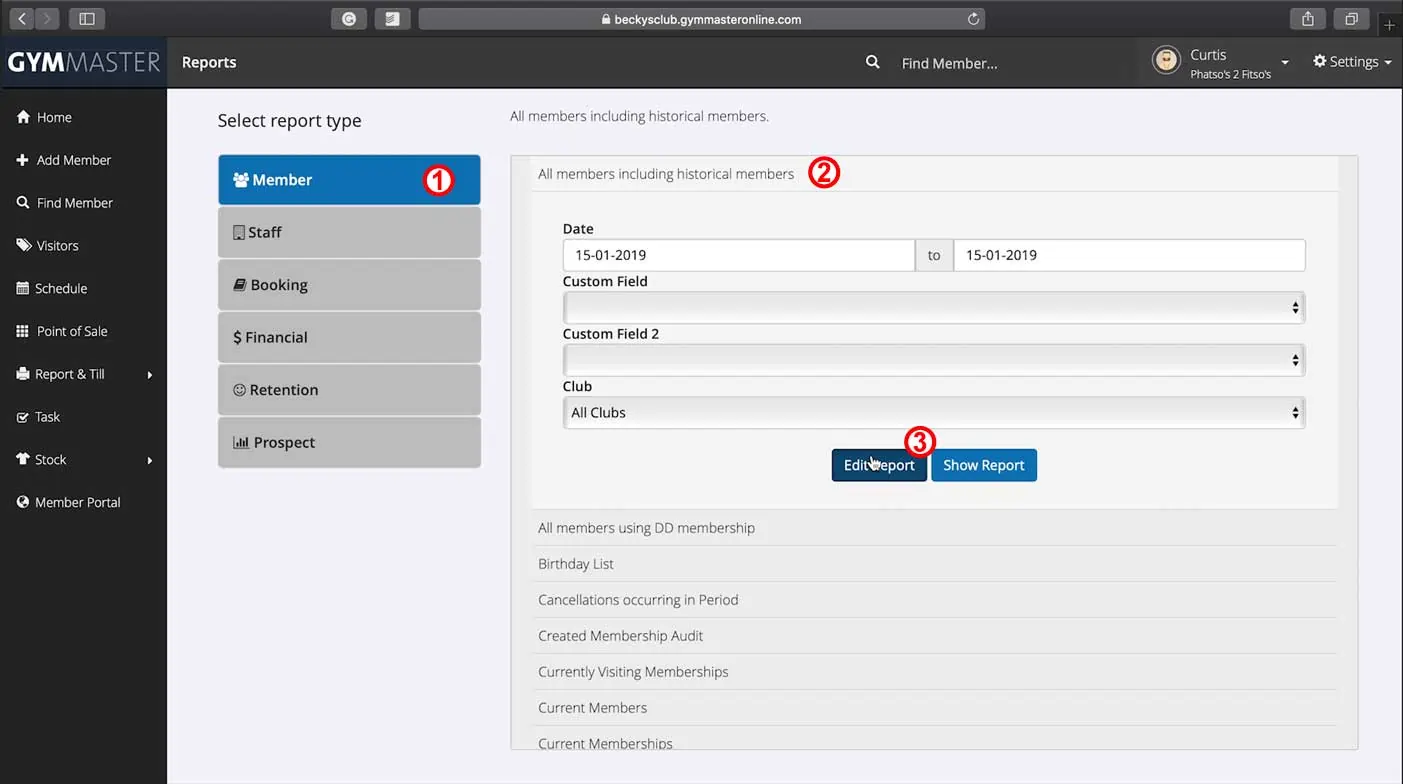
- “Member”
- “All Members including Historical Members”
- “Edit Report”
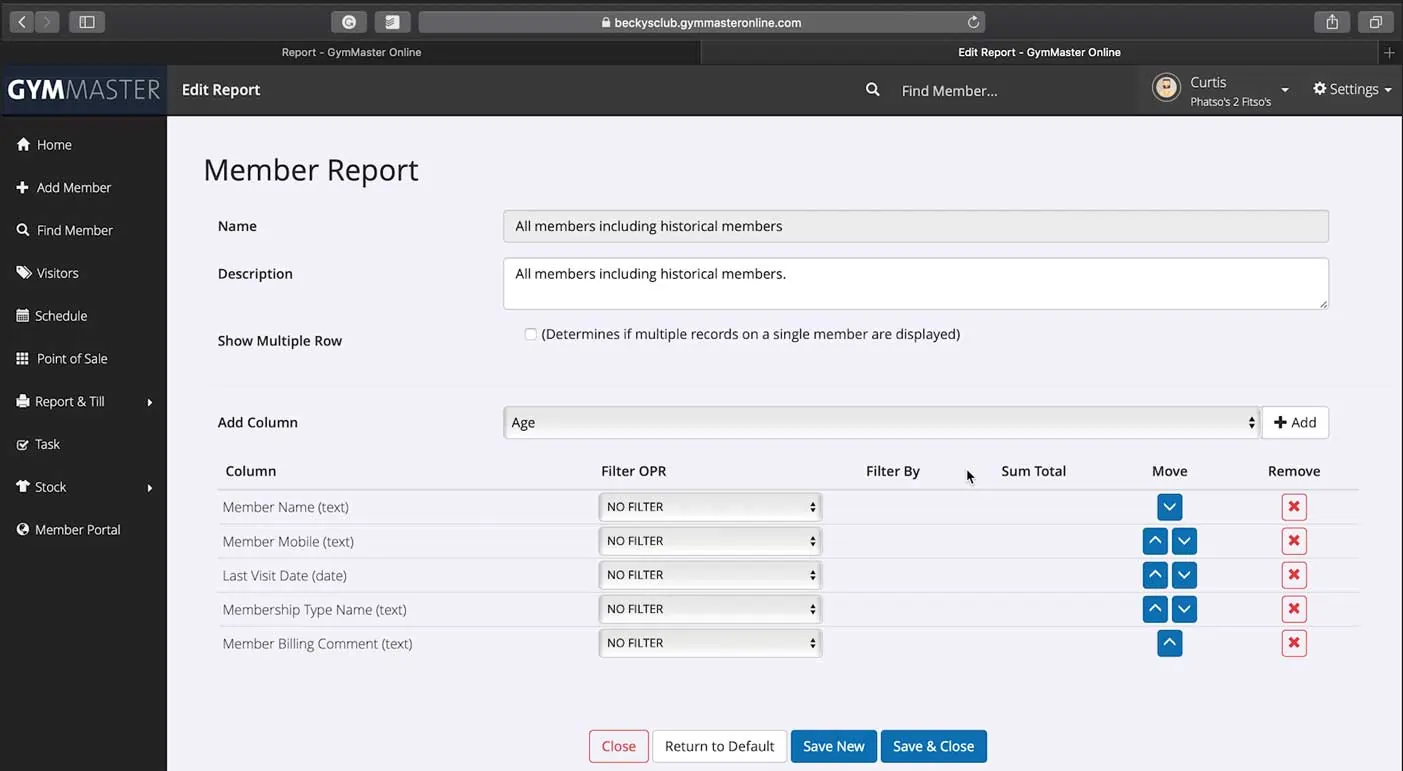
As you can see, this report comes with a few fields set by default. Let’s tidy this up so it only shows the information we are looking for.
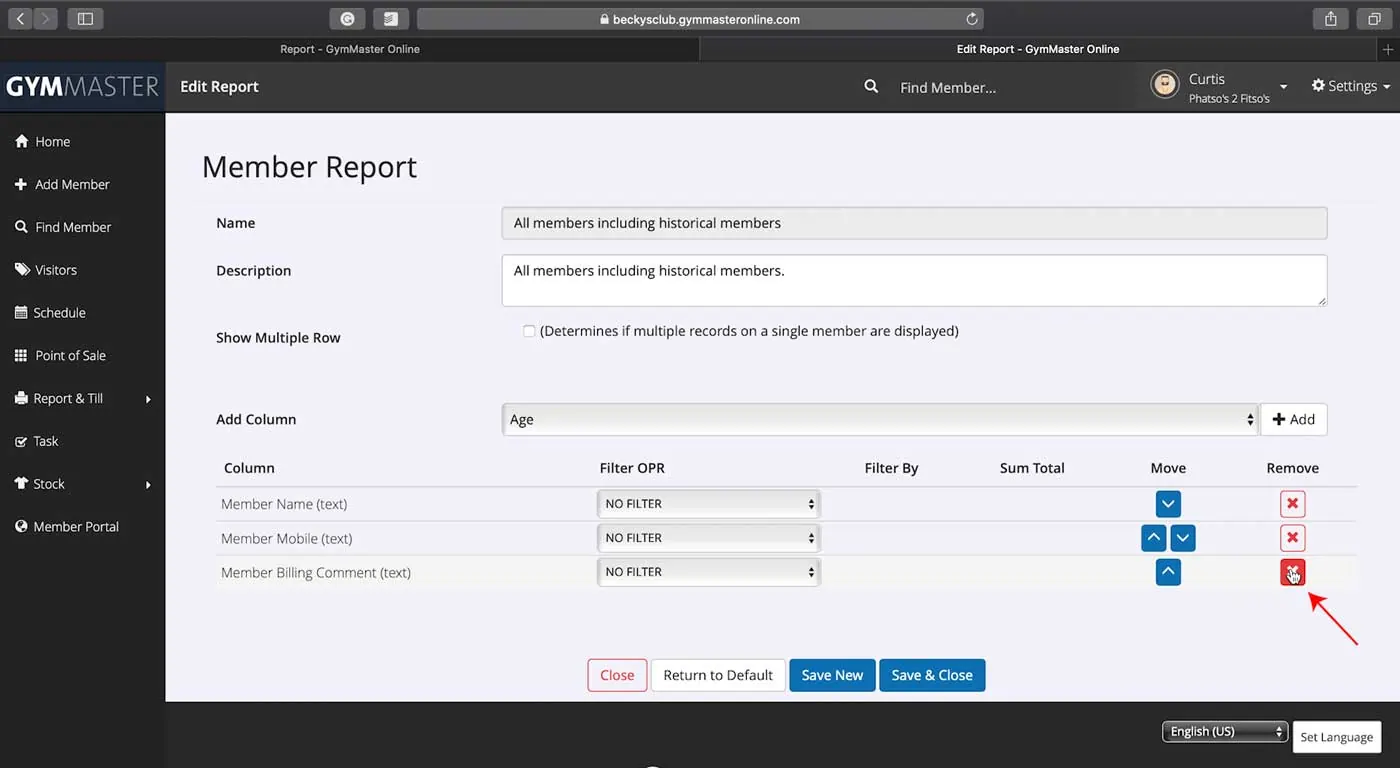
First let’s remove the unnecessary bits, you can do this by clicking the red cross next to the field we’re trying to remove. Let’s get rid of the “Last Visit Date”, “Membership Type Name” and “Member Billing Comment” fields for now.
Next, we’re going to need to add in the emergency contact information. To do this we will click the dropdown menu next to “Add Column” and select the fields for the emergency contact details.
I’m going to go ahead and add the following fields to the report: Member emergency cell phone, Member emergency home phone and Member emergency contact name.
Great! Now that we have all the information we need for our report we can go ahead and click “Save New” that way we still keep our original report and have our new custom report as well. If we were only making a couple of changes to the report like adding one or two fields, you could just click “Save & Close” and this would overwrite the original report.
With our new report completed and saved we can now view it by refreshing the page and finding the name in the reports list and click “Show Report”.
There are limitations to what can be added or drawn through reports. This is because the information often comes from different tables within the database.
If you are experiencing any issues, please be sure reach out.
Stuck for Ideas? - Try customising the following reports to suit your business
- “Members” > “All members excluding historical members” - shows all members excluding those who were members in the past but aren’t a member of your club currently.
- “Members” > “Lost Members” - shows your clubs ex-members (those who held a membership but it has since lapsed)
- “Retention” > “Recently Not Visiting” - shows a list of members who haven’t visited in the last few weeks but have visited within 3 - 6 weeks of the selected start date.
- “Retention” > “Member visit count in period” - shows the number of visits a member has made within a selected time period.
- “Prospect” > “All Current Prospects” - shows all current prospective members for your club.
- “Prospect” > “Prospects entered in period” - All current prospects who made their first contact during the given period.