
Leads captured within the GymMaster member portal which have been generated from Facebook & Instagram can now be tracked and attributed to your efforts on social media with the new ability to install the Facebook pixel in GymMaster. You can determine which posts or ad campaigns are performing best for your gym and view user behaviour through the member portal from Facebook Analytics or Ads Manager, allowing you to adjust your club’s marketing efforts to be more efficient, effective and profitable.
Setting up the Facebook Pixel with GymMaster is easy and takes only a couple of minutes.
Here’s how you can implement the Facebook Pixel in GymMaster:
Step 1: Find Your Facebook Tracking Pixel
First you need to create your tracking pixel within Facebook. To do that, you will need to have already set up a Facebook business account, click here to do this.
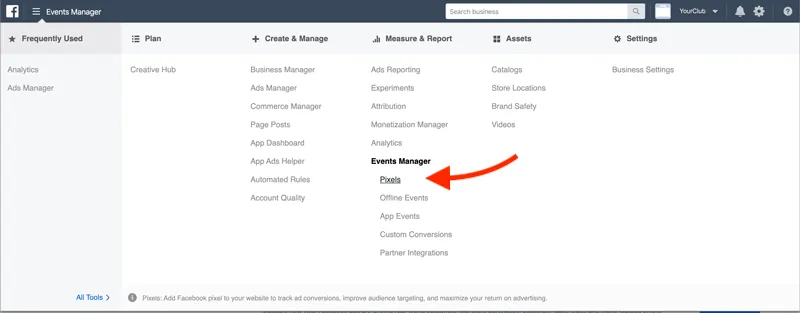
- With your business account created and logged in, you can then click the top left menu to navigate to the pixel setup page–like so: Menu > Events Manager > Pixels
- Click Set up Pixel
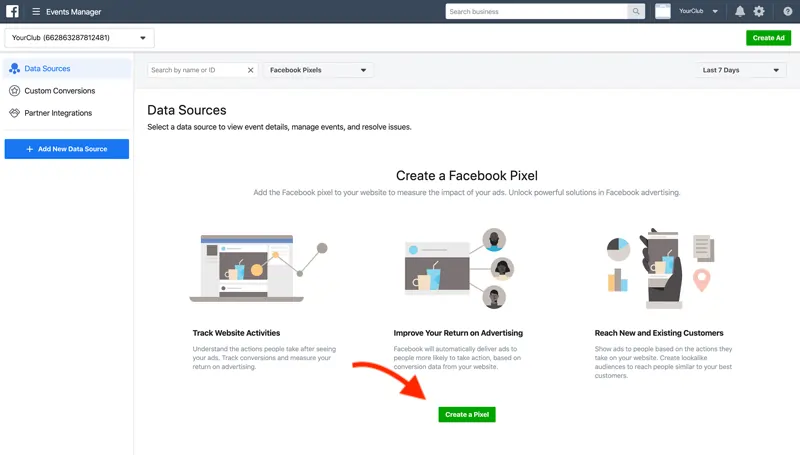
- Enter a name for your pixel & Click ‘Create’
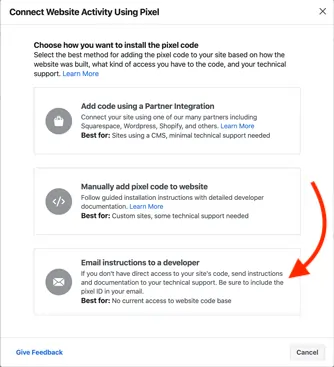
- Click Email Instructions to a Developer
- Click to copy your Pixel ID
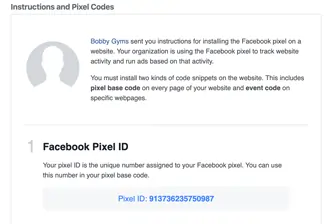
You can now exit this page (or send yourself this email incase you want this information later on)
Step 2: Find the ‘Facebook Pixel ID’ field in GymMaster’s Member Portal Settings
Next we must navigate to GymMaster’s settings to insert your pixel into the Member Portal.
- Click Settings > Member Portal
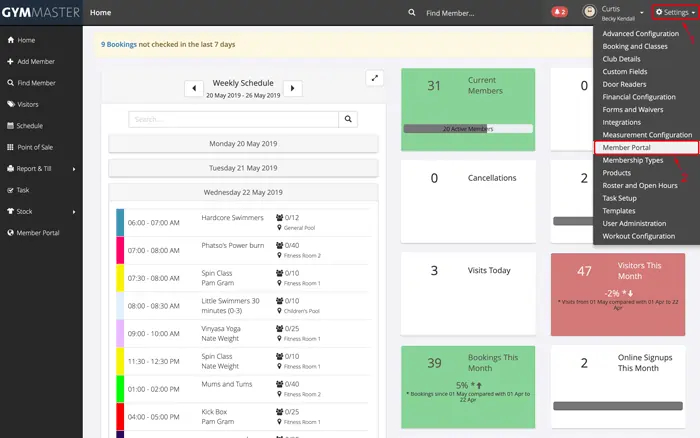
- The Facebook Pixel ID field is under the ‘General’ heading
Step 3: Insert your Facebook Pixel into the Field & Click Save
Now the Facebook Pixel ID field is located, just paste the pixel ID you copied in step 1 into the box and click the save button at the top of the page.
Step 4: Test everything is working
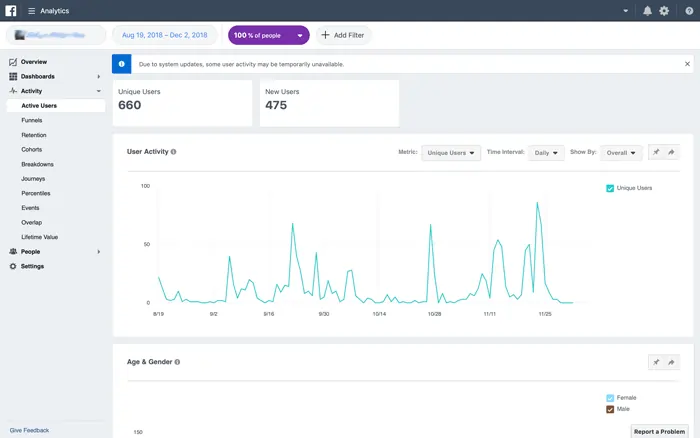
That’s it! The Facebook pixel has been installed and data should begin sending to your Facebook analytics shortly. Make sure it’s receiving the traffic by going through the process of clicking on an ad or link within a post yourself and navigating through your member portal, try signing up for a membership or booking a class and see how that tracks.
Facebook also has an extension for chrome users called ‘Pixel Helper’ which helps you validate and ensure your pixel is working correctly. Click here for more details on the Facebook Pixel Helper
Now that you have your pixel installed, you are able to track users referred to your member portal from Facebook and Instagram and more clearly understand what’s working for your business and what isn’t.
For more information on the Facebook pixel and how it can be used, Click Here for Facebook’s guide. Be sure to reach out to